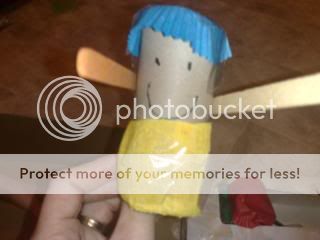
Don't you just love it when your children bring things home from school that they have made. I was really amazed when my 5 year old Samuel (who has Aspger) at what he has been making in Prep. The thought that has gone into it is extraordinary. Actually children do amazing art because they aren't inhibited by fears of failing but rather are excited by the world of possibilities that a box full of recycled bits and pieces holds.
Friday, September 3, 2010
Thursday, September 2, 2010
Quality Time!: Friday Follow New Friends # 8 and Blog hop Friday!...
Quality Time!: Friday Follow New Friends # 8 and Blog hop Friday!...: "Friday Follow New Friends #8 Link up your Blog, Facebook, Twitter and Community. Don't for get to leave me comment :-)
Creating Your Own Art Work
I found a great way to design your own wall art through a on-line website called Scape Interiors. This is what I came up with:
Wednesday, September 1, 2010
Fabric Flower Tutorial
I found saw this fabric flower tutorial on a blog but for the life of me do you think I can find it now. So I decided to try and do it from memory. It actually turned out pretty good.
1. First I cut out a square piece of material.
2. Then I found something round to trace a circle onto the material.
3. Then I cut out strips of material that I would use to make the flower out of. Due to not being long enough I sewed them together with french seams.
4.Then I started to sew the strips of material on the square piece. Whilst doing this you need to add pleats as you go. If you stop each time you go over your pleat then make sure the needle is still in the fabric, lift up the foot and add the next pleat. Then put the foot down again and sew until you have just gone over the pleat. Then repeat the same process as you go round the circle.
Now I want to make smaller ones and I can put them onto some hair bands.
1. First I cut out a square piece of material.
2. Then I found something round to trace a circle onto the material.
3. Then I cut out strips of material that I would use to make the flower out of. Due to not being long enough I sewed them together with french seams.
4.Then I started to sew the strips of material on the square piece. Whilst doing this you need to add pleats as you go. If you stop each time you go over your pleat then make sure the needle is still in the fabric, lift up the foot and add the next pleat. Then put the foot down again and sew until you have just gone over the pleat. Then repeat the same process as you go round the circle.
Now I want to make smaller ones and I can put them onto some hair bands.
Other Ideas for Using Your Quilting Hoops
![]() |
| easy d.i.y.: quilt hoop fabric frame |
![]() |
| Quilting Hoop Drum |
![]() |
| Liberty of London Swatch Portraits |
![]() |
| Embroidery Hoop Wall Art |
![]() |
| Floral Bloom On Embroidery Hoop |
![]() |
| Wall Hoop Decor |
Labels:
diy,
embroidery hoop art,
embroidery hoops,
hoop bulletin board,
thrifty solutions,
wall art
Subscribe to:
Posts (Atom)